Invites
Artisanal Futures is invite-only — send, track, and manage the per-email invitation codes that let new people join, from Admin → Invites.
Why invites exist
Artisanal Futures is a closed, invite-only platform — nobody can create an account on their own. The only way a new person joins is for an admin to send them a personal invite tied to their email address. There are no shared or universal join codes; every invite is single-use and matched to one email.
Where to find it
Go to Invites in the admin sidebar (/admin/invites). This page is admin-only.
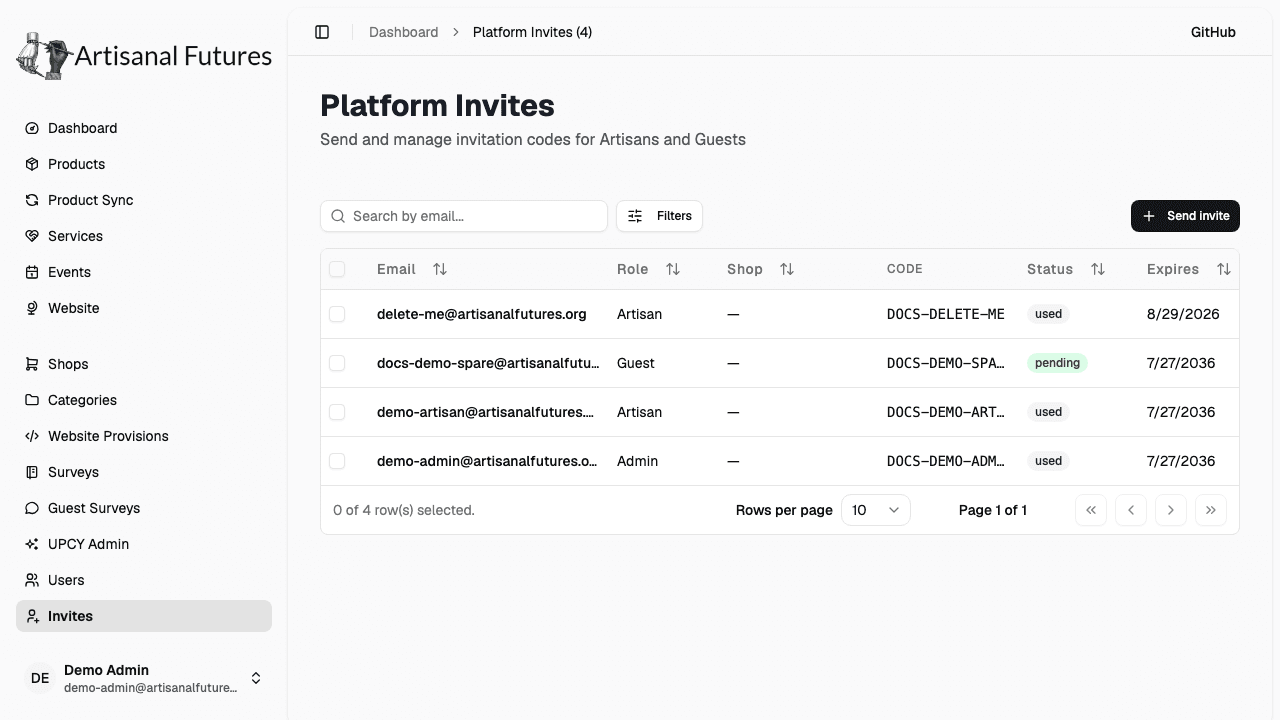
Sending an invite
- Click Send invite near the top of the page.
- Enter the person's email address. They must sign up using this exact address — if they use a different one, the platform refuses the sign-up.
- Choose their role: Artisan, Guest, or Admin (the dropdown opens on Guest).
- If you chose Artisan, you can optionally attach an existing shop to the invite — pick one from the list, or leave it as "No shop — create during onboarding." Only shops without another pending invite are selectable. If you attach a shop, the invitee takes ownership of it once they finish onboarding.
- Click Send invite.
The platform emails the recipient an 8-character invitation code and a link that opens the right sign-up wizard with the code pre-filled. The invite is single-use and expires 30 days after you send it.
There's no "resend" button. If an invite expires, goes to the wrong inbox, or gets lost, send a brand-new invite rather than trying to resend the old one — a code can't be reissued, only replaced.
What the invitee experiences
- They get an email titled "You're invited to join Artisanal Futures as a [role]," showing their code and a Join as [role] button, where [role] is the role you picked.
- The button opens the sign-up wizard with the code already filled in and checked automatically.
- They set a password, fill in account details, and (for Artisans) answer a few business questions to finish their profile.
- Once they finish, they're signed in and land on their welcome page.
They must sign up with the same email address the invite was sent to — a typo or a different address causes the sign-up to be rejected.
The invites table
Each row shows Email, Role, Shop (if one's attached), Code, Status, Expires, Created, and Created by. Status is computed, not stored, and is one of:
- pending — still valid, not yet used
- used — the person finished the full sign-up wizard with it
- expired — past its 30-day window
An invite can still show pending even after someone has created a login with it — status only flips to used once they finish the entire onboarding flow (account and profile), not the moment the account is created.
Managing invites
- Attach or change a shop: open a pending Artisan invite's ⋯ menu and choose Attach shop (or Change or detach shop if one is already attached). This doesn't send a new email — the existing code stays valid.
- Delete invites: check the box next to one or more invites and click Delete in the selection bar that appears. Deleting is permanent and can't be undone.
There's no per-row delete button — deleting is a bulk action from the selection checkboxes.
Related
Once someone's invite is used, they show up as a full account — see user management to change their role or reset their password later.